- Messages
- 1,163
- Classified ads
- 2
You are doing it wrong.I spent some more time with this today. Other than drifting the front sight into place, which was really difficult, the hardest problem so far was getting the Trijicon RMR HD mounting plate to sit completely flat and snug against the slide due to the screws that come with the RMR HD being just a little too long for this slide-- probably an issue with the tolerances of the slide manufacturer, since they appear to have taken a fraction of a millimeter too much off this slide. Either way, I ended up putting thin elastomer washers under the screws to raise them about 0.2 millimeters and absorb any imperfect tolerances, and now it's a perfect fit and very solid. Next, I need to properly fit the ambi safety so that it functions perfectly. Although it nominally works, it's hard to engage and is jiggly when not engaged. I may have just not lined up the sides properly, plus I probably need to take a little material off the frame clearance notch. The barrel bushing also needs a little material taken off on the outside of it, since it's super tight. After that, I will test fire and report back.
It's a normal job to shorten mounting screws to fit the exact hole they are used in when working on guns.
That's what the "some gunsmithing required" means when you buy parts for guns.
If a screw 1 thread too long, simply shorten the screw one thread.
Do this to each screw as needed to keep the screw as long as possible while still fully seating.
1911 safeties come oversize on purpose so you can fit them.
Start by making sure the safety can fit into the fully stripped frame.
The shorter safety post must move up and down freely within the oval cut.
If it's tight on one end or the other of travel, you file inside the notches on the shorter post that pokes through the oval cut in the frame.
Then you move on to fitting the safety to the sear.
With all the fire control parts installed in the frame, start trying to install the safety and engaging it.
It's normal for it not to engage when you start.
Forcing it a little will show you where the tight spot is after you remove the safety.
Now you have to make the safety fully engage the sear until the safety fully engages the safety cut on the slide.
With the safety in a small vise, file the top edge of the safety that engages the sear as shown here:
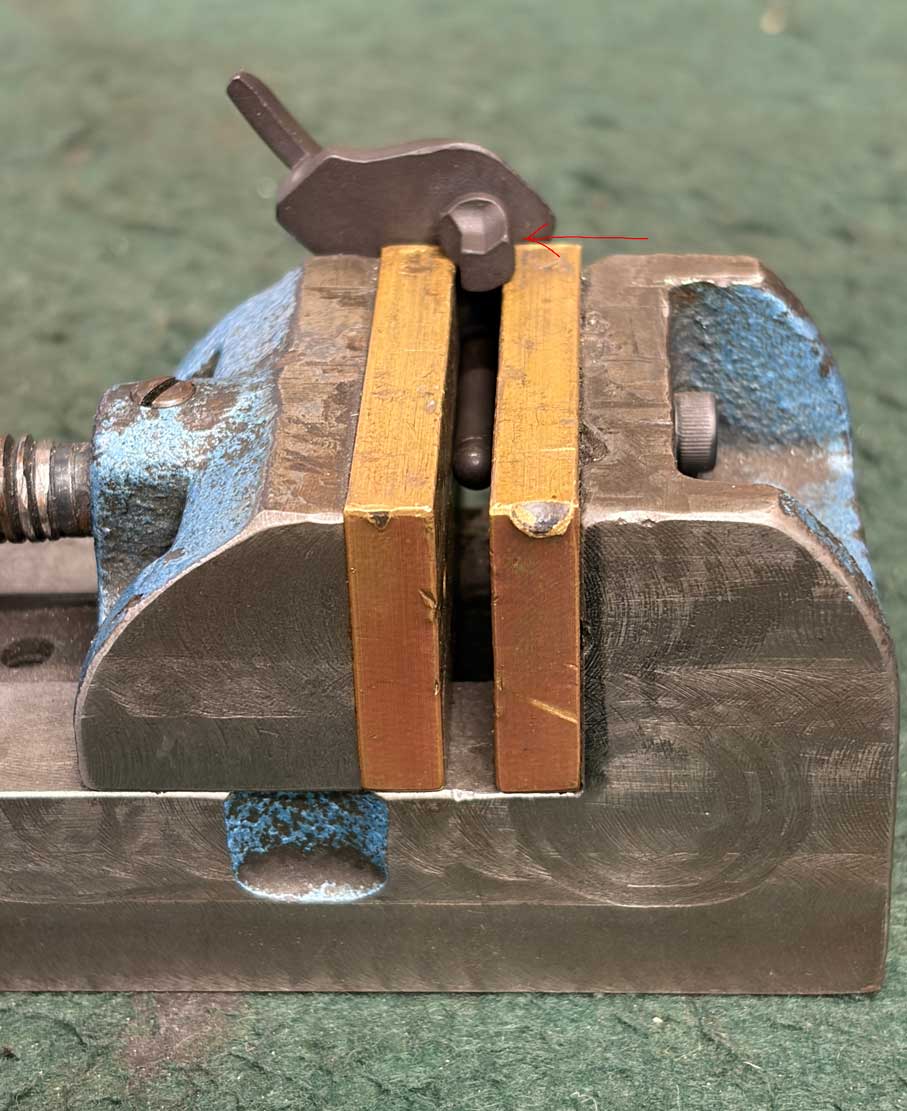
The sear should have absolutely NO movement with the safety engaged while pulling the trigger so do not file very much as you should check often to be sure you don't take too much.
As you get close, you will feel the engagement getting easier and easier with each file-then-check cycle.